Sparkle and Shine: The Ultimate Guide to Swarovski Nail Designs
- AmazoniaSilva
- Tháng 12 11, 2024
- Zodiac signs
- 0 Comments
Swarovski Nail Designs are the epitome of elegance and glamour. These dazzling crystal embellishments can transform any manicure from ordinary to extraordinary, adding a touch of sparkle and sophistication. Whether you’re looking for subtle shimmer or bold bling, Swarovski crystals offer endless possibilities for creating unique and eye-catching nail art. This guide will delve into the world of Swarovski nail designs, exploring different styles, application techniques, and aftercare tips to help you achieve a flawless, long-lasting sparkle.
Understanding Swarovski Crystals for Nails
Swarovski crystals are renowned for their exceptional brilliance and precision-cut facets. These tiny gems are available in a vast array of colors, shapes, and sizes, allowing for endless creativity in nail art. From classic clear crystals to vibrant jewel tones and iridescent finishes, there’s a Swarovski crystal to match any style and occasion. Understanding the different types of crystals and their application methods is crucial for creating stunning and durable Swarovski nail designs.
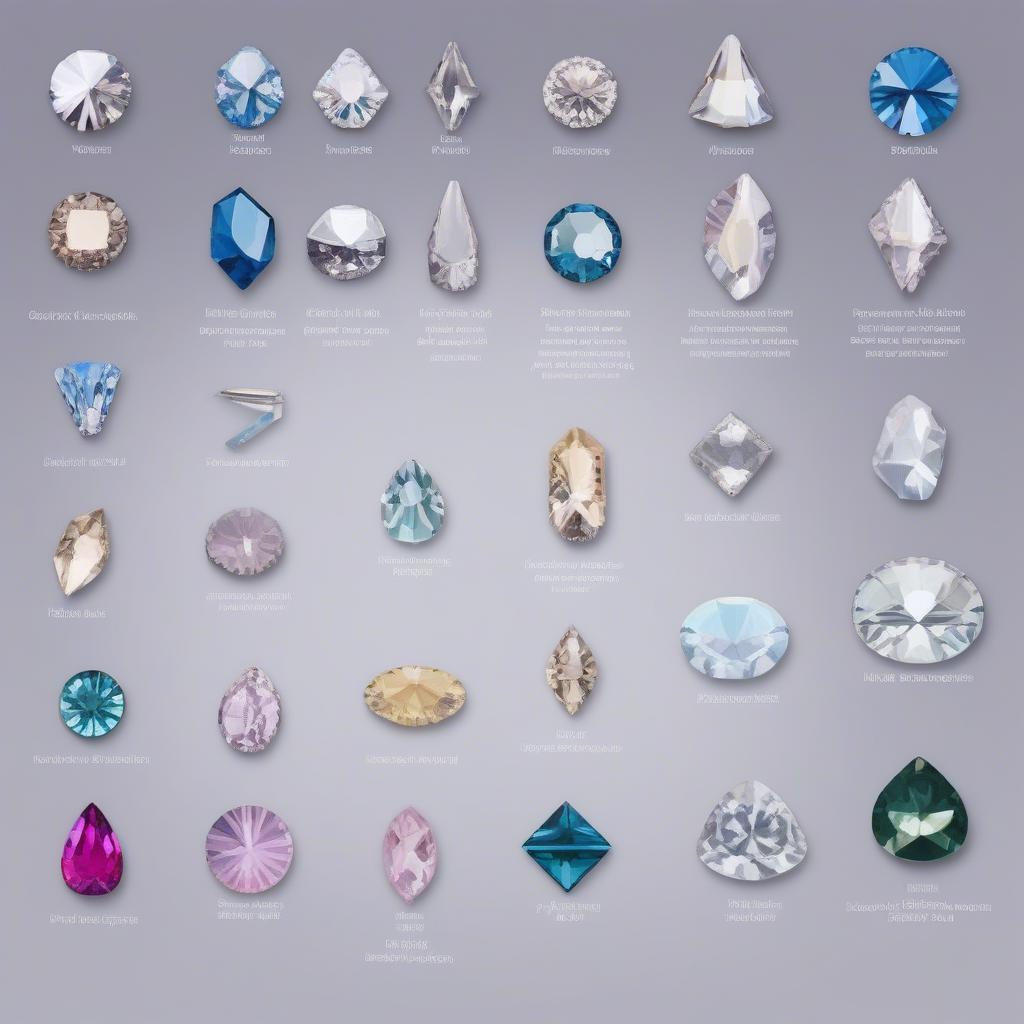
Types of Swarovski Crystals for Nail Art
- Flat Back Crystals: These are the most common type used in nail art, featuring a flat back for easy adhesion to the nail surface.
- Pointed Back Crystals: These crystals require special settings or glue for application and are often used for 3D nail art.
- Crystal Pixie: This is a fine crystal dust that can be sprinkled onto wet gel polish or acrylic for an all-over shimmer effect.
- Bicone Crystals: These elongated, double-pointed crystals add a touch of elegance and are perfect for creating intricate patterns.
Types of Swarovski Crystals for Nail Art
Creating Stunning Swarovski Nail Designs
Achieving a professional-looking Swarovski nail design requires the right tools and techniques. Whether you’re a seasoned nail technician or a DIY enthusiast, following these steps will help you create dazzling manicures that last.
Preparing Your Nails
Start with clean, dry nails. Gently push back your cuticles and file your nails to your desired shape. Apply a base coat to protect your natural nails and enhance adhesion.
Applying the Crystals
Using tweezers or a wax pencil, carefully pick up the Swarovski crystals and place them onto the still-wet gel polish or acrylic. Gently press down to secure the crystals in place.
Sealing the Design
Once the crystals are positioned, apply a top coat to seal the design and add extra shine. Ensure the top coat covers the entire nail and the edges of the crystals to prevent them from snagging or falling off.
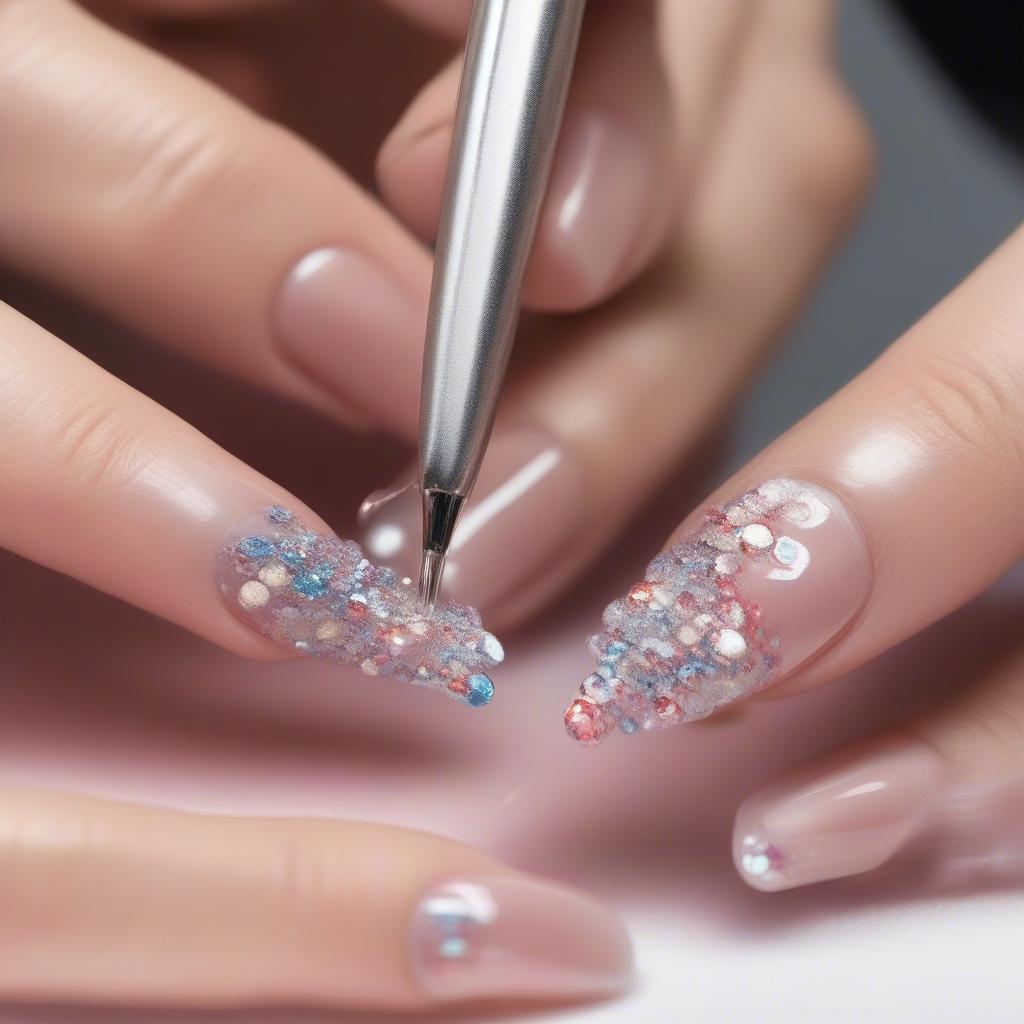 Applying Swarovski Crystals to Nails
Swarovski Nail Design Ideas
From subtle accents to elaborate patterns, the possibilities for Swarovski nail designs are endless. Here are some inspiring ideas to spark your creativity:
- French Manicure with a Twist: Add a row of small Swarovski crystals along the smile line of a classic French manicure for a touch of sparkle.
- Ombre Glitter Nails: Create a gradient effect with glitter polish and accentuate it with strategically placed Swarovski crystals.
- Accent Nail Designs: Embellish one or two nails with a cluster of Swarovski crystals for a statement look.
- Geometric Patterns: Use Swarovski crystals to create intricate geometric designs, such as stripes, chevrons, or diamonds.
Choosing the Right Adhesive
Using the correct adhesive is essential for ensuring the longevity of your Swarovski nail designs. Nail glue, resin, or gel top coat can be used to secure the crystals.
“The key to a long-lasting Swarovski manicure is using a high-quality adhesive and properly sealing the design,” says renowned nail artist, Amelia Stone.
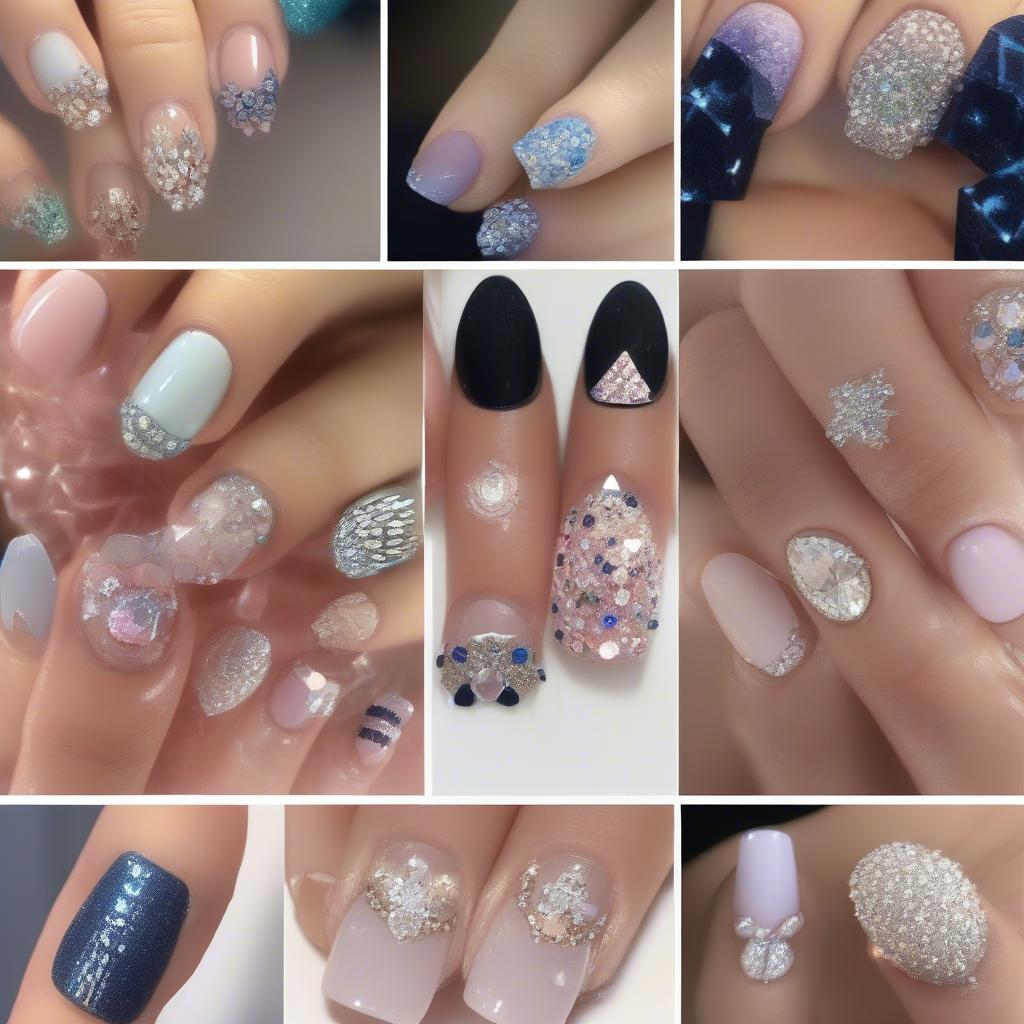 Swarovski Nail Design Ideas
Caring for Your Swarovski Nail Designs
Proper aftercare will help maintain the shine and prevent the crystals from falling off. Avoid using harsh chemicals or abrasive cleaners, and be gentle when performing household chores.
“Regular application of cuticle oil will help keep the surrounding skin hydrated and prevent lifting,” adds Amelia Stone.
Conclusion
Swarovski nail designs offer a luxurious and glamorous way to elevate your manicure. With a little practice and the right techniques, you can create stunning and long-lasting crystal embellishments that will turn heads. From subtle shimmer to dazzling bling, Swarovski crystals offer endless possibilities for expressing your personal style. So, embrace the sparkle and shine, and transform your nails into miniature works of art with these captivating crystal creations.
FAQs
-
How long do Swarovski crystals stay on nails? With proper application and care, Swarovski crystals can last for several weeks.
-
Can I remove Swarovski crystals at home? Yes, you can soak your nails in acetone to loosen the adhesive and gently remove the crystals.
-
Are Swarovski crystals safe for natural nails? Yes, as long as they are applied and removed correctly.
-
What is the best way to clean Swarovski nail designs? Use a soft brush and mild soap to gently clean around the crystals.
-
Can I reuse Swarovski crystals? Yes, you can carefully remove and clean them for future use.
-
Where can I buy Swarovski crystals for nails? You can find them at beauty supply stores, online retailers, and specialized nail art shops.
-
What are some other nail art trends that complement Swarovski crystals? Chrome nails, ombre designs, and negative space manicures all pair well with Swarovski crystals.
Need Further Assistance?
For any inquiries or support, please contact us at [email protected] or visit our office at Fifth Avenue, 34th Floor, New York, NY 10118, USA. We have a 24/7 customer support team available to assist you.

