Pole Gel: Your Ultimate Guide to Gorgeous, Long-Lasting Nails
- AmazoniaSilva
- Tháng 12 26, 2024
- Zodiac signs
- 0 Comments
Pole Gel manicures are taking the beauty world by storm, offering a durable and glamorous alternative to traditional acrylics or gel nails. This comprehensive guide dives deep into the world of pole gel, exploring everything from its application process and benefits to design ideas and aftercare tips. Whether you’re a seasoned nail enthusiast or a curious beginner, you’ll find everything you need to know about achieving stunning, long-lasting nails with pole gel.
What is Pole Gel? Understanding the Basics
Pole gel is a unique nail enhancement system that combines the strength of acrylics with the flexibility of hard gel. It’s applied using a builder gel and cured under a UV or LED lamp, resulting in a strong, yet lightweight, nail extension. This innovative formula allows for intricate nail art and designs, making it a favorite among both professionals and DIY enthusiasts. Unlike traditional acrylics, pole gel produces minimal odor and doesn’t require harsh filing, making it a healthier option for your natural nails.
Benefits of Choosing Pole Gel
Why choose pole gel over other nail enhancement methods? Here are some compelling reasons:
- Durability: Pole gel nails are incredibly resilient, resistant to chipping and breaking, and can last for several weeks with proper care.
- Flexibility: Despite their strength, pole gel nails maintain a natural flexibility, reducing the risk of painful snapping.
- Lightweight Feel: Enjoy the look of long nails without the heavy, uncomfortable feeling often associated with acrylics.
- Natural Look: Pole gel can be applied thinly, creating a natural, seamless look that enhances your own nails.
- Odorless Application: Say goodbye to the strong chemical smells often associated with traditional acrylics.
- Versatile Designs: From intricate nail art to classic French manicures, pole gel offers endless design possibilities.
Applying Pole Gel: A Step-by-Step Guide
Achieving the perfect pole gel manicure involves a precise application process. Here’s a step-by-step guide to help you get started:
- Prep Your Nails: Gently push back your cuticles and buff the surface of your nails to create a smooth base.
- Apply a Dehydrator and Primer: This ensures proper adhesion and prevents lifting.
- Apply the Base Coat: A thin layer of base coat is essential for protecting your natural nails. Cure under a UV/LED lamp.
- Apply the Pole Gel: Using a brush, apply the pole gel to your nail, building the desired shape and length. Cure each layer under the lamp.
- Shape and File: Once cured, file and shape the nails to your desired look.
- Apply Top Coat: Seal in your design and add shine with a top coat. Cure under the lamp.
Designing with Pole Gel: Unleash Your Creativity
The real magic of pole gel lies in its versatility. From minimalist designs to elaborate nail art, the possibilities are endless.
- Ombre Nails: Create a gradient effect using two or more shades of pole gel.
- French Manicure: Achieve a classic and elegant look with a white tip and a natural pink base.
- Glitter and Rhinestones: Add some sparkle and glamour with glitter, rhinestones, or other embellishments.
- 3D Nail Art: Take your nail game to the next level with intricate 3D designs.
“Pole gel allows for incredible artistic expression,” says renowned nail artist, Sarah Johnson. “The flexibility and durability of the product make it a dream to work with, allowing me to create stunning and long-lasting designs for my clients.”
Pole Gel Aftercare: Maintaining Your Gorgeous Manicure
To keep your pole gel nails looking their best, follow these essential aftercare tips:
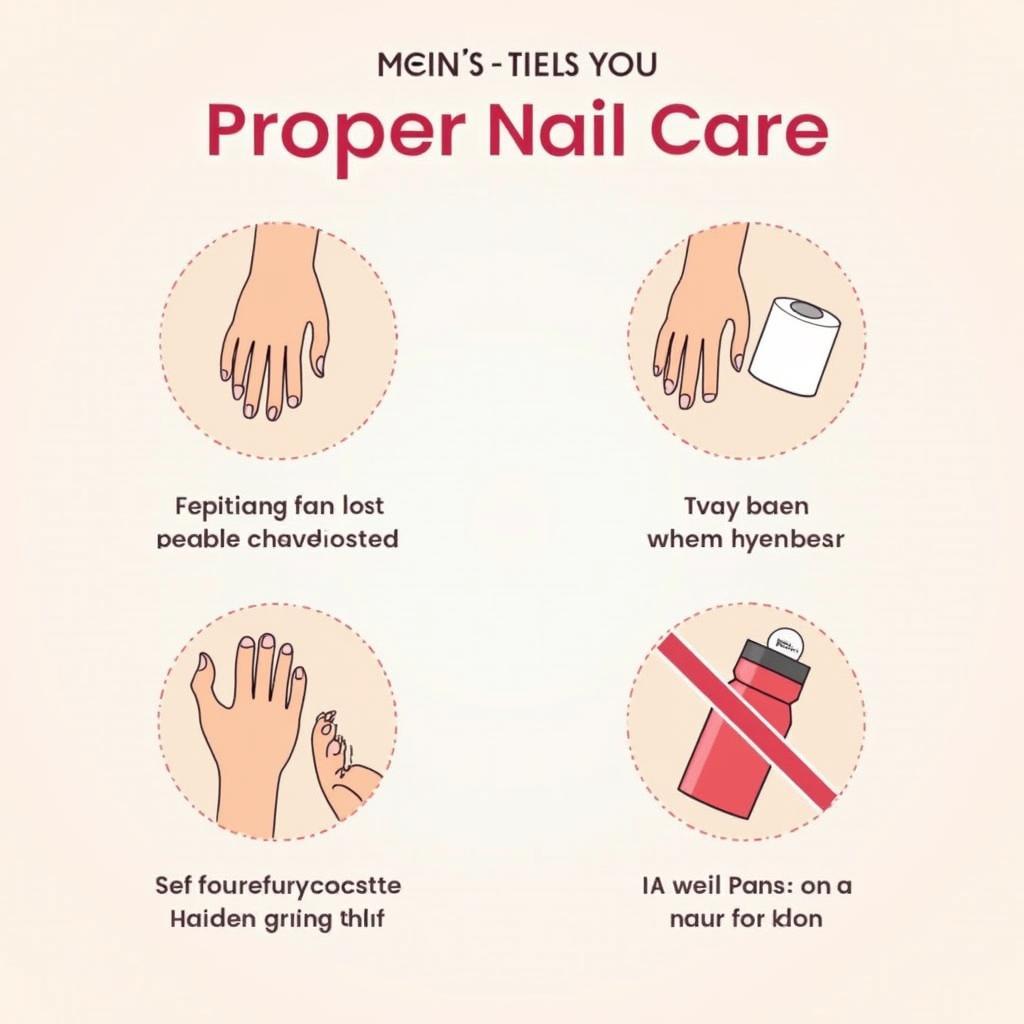
- Moisturize Regularly: Keep your cuticles and surrounding skin hydrated.
- Avoid Harsh Chemicals: Wear gloves when cleaning or using harsh chemicals.
- Don’t Pick or Peel: Resist the urge to pick or peel your pole gel, as this can damage your natural nails.
- Regular Fill-ins: Schedule regular fill-in appointments every 2-3 weeks to maintain the shape and strength of your nails.
Essential Pole Gel Aftercare Tips
Conclusion: Embrace the Beauty of Pole Gel
Pole gel offers a revolutionary approach to nail enhancements, combining strength, flexibility, and endless design possibilities. By following the proper application and aftercare techniques, you can enjoy beautiful, long-lasting nails that enhance your overall style.
FAQ
- How long does a pole gel manicure last? Typically 3-4 weeks with proper care.
- Is pole gel damaging to natural nails? No, pole gel is less damaging than traditional acrylics when applied and removed correctly.
- Can I apply pole gel at home? Yes, but it requires practice and the right tools.
- How do I remove pole gel nails? Soak your nails in acetone or use an electric file.
- What is the difference between pole gel and builder gel? Pole gel is a type of builder gel specifically formulated for nail extensions.
- How much does a pole gel manicure cost? Prices vary depending on the salon and design, but typically range from $50-$80.
- Can I apply regular nail polish over pole gel? Yes, you can apply regular nail polish and remove it with acetone-free polish remover.
For further assistance, please contact us at [email protected] or visit our office at Fifth Avenue, 34th Floor, New York, NY 10118, USA. We have a 24/7 customer service team ready to help.